Visual supports are simple, powerful tools that help people understand, remember and act on information. For neurodivergent children, teens and adults, and for many learners of all kinds for that matter, visuals are not a crutch. They’re a bridge: connecting language, memory and everyday routines so people can be more independent, confident and included.
This post explains the benefits of visual supports, clears up common myths (especially the worry that visuals create “dependence”), and gives concrete, real-life examples for home, school and community. Practical tips are also shared on how to use visuals effectively, including why consistently referencing them matters, for everyone using visuals.
Why visual supports matter for everyone
Visuals turn fleeting spoken language into persistent, easy-to-access information. They:
- Reduce cognitive load : people don’t have to hold all the steps in their head.
- Support comprehension : pictures, icons or key words clarify instructions.
- Teach routines & expectations : predictable visuals help people anticipate what happens next.
- Increase participation & independence : users can follow steps, make choices and finish tasks with less adult help.
- Help generalise skills : visual routines can be reused in different places (home → school → community).
Put simply: visuals scaffold the brain, and scaffolds are meant to be used until learners can do things with more independence.
Myth-busting: “Visuals create dependence” — why that’s not true
This is the most common misconception. Here’s why it’s wrong:
- Visuals are teaching tools, not permanent crutches. Like training wheels, visuals support early learning. With consistent use and fading, many people need visuals less over time.
- Everyone uses visuals. Think of checklists, signs, road maps which adults rely on external aids all the time. Saying visuals create dependence ignores that even neurotypical adults use supports to function efficiently.
- Failure usually reflects poor implementation, not the tool. “We made a chart but it didn’t work” often means the visual wasn’t introduced, modelled or referenced consistently. It may be too complex, poorly placed, or not part of a routine. In other words: the how matters.
- Visuals increase communication opportunities. They let people request, refuse, plan and explain, which increases language use rather than decreases it.
Why consistent referencing is critical for all visual users
Making a visual is only step one. The real gains come when adults consistently point to, read from, prompt with and fade the visual in everyday interactions. For autistic learners and many neurodivergent learners, habit and repetition are essential because:
- Visuals create stable cues that reduce anxiety about “what will happen next.”
- Referencing teaches how to use the tool, i.e. showing someone where to look, what to say, and when to check the visual is explicit instruction.
- It supports transfer: if you point to the schedule at home, the learner will more readily look for it at school or a community centre.
- It prevents the “it didn’t work” pitfall: failure is often due to the visual being ignored, hidden, or never modelled.
Practical rule: introduce the visual, model it (every time at first), prompt with it, and plan to fade prompts gradually.
Real-life examples
Home
- First–Then Board (Morning Routine)
Visual: two boxes — First: brush teeth → Then: breakfast
Benefit: reduces morning meltdowns by setting clear steps.
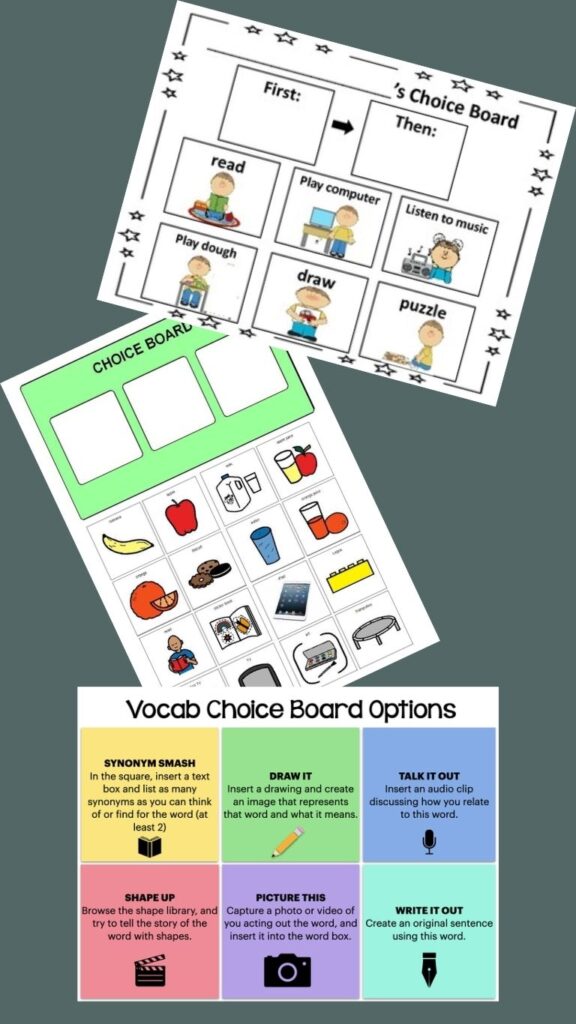
How to use: Parent taps “First” and says, “First brush teeth,” models brushing, then taps “Then” and prompts the child to choose cereal. - Choice Board at Snack Time
Visual: photos/icons of two snack options.
Benefit: encourages requests (“I want apple”) and reduces tantrums.
Script: “Do you want apple or banana? Point to the picture.” - Visual Recipe Cards (Cooking Together)
Visual: step photos for making a sandwich.
Benefit: builds sequencing, independence and life skills.
School
- Visual Schedule (Classroom)
Visual: daily timetable with icons for Math, Recess, Assembly.
Benefit: supports transitions, reduces anxiety, improves attention.
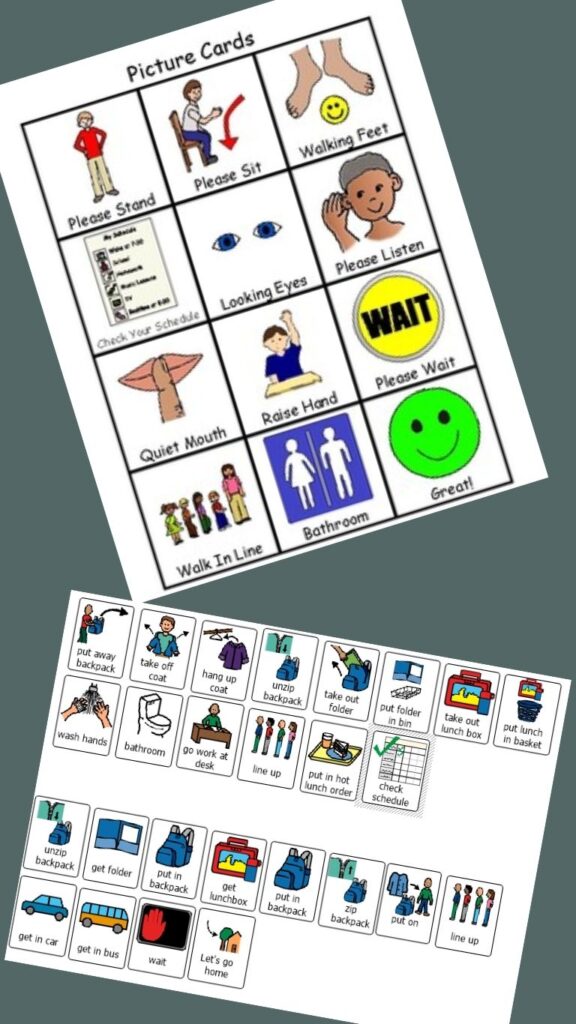
Teacher routine: at lesson start, point to schedule and say, “After Math, we have recess — two more tasks.” - Social Cue Cards
Visual: short prompts like “Take turns,” “Look at speaker,” “Wait your turn.”
Used in group work and PE to support pragmatics and reduce peer conflict. - Task Strip for Writing
Visual: numbered steps for planning a paragraph (1. Think topic; 2. List 3 ideas; 3. Write sentence).
Benefit: breaks complex tasks into manageable chunks
Community
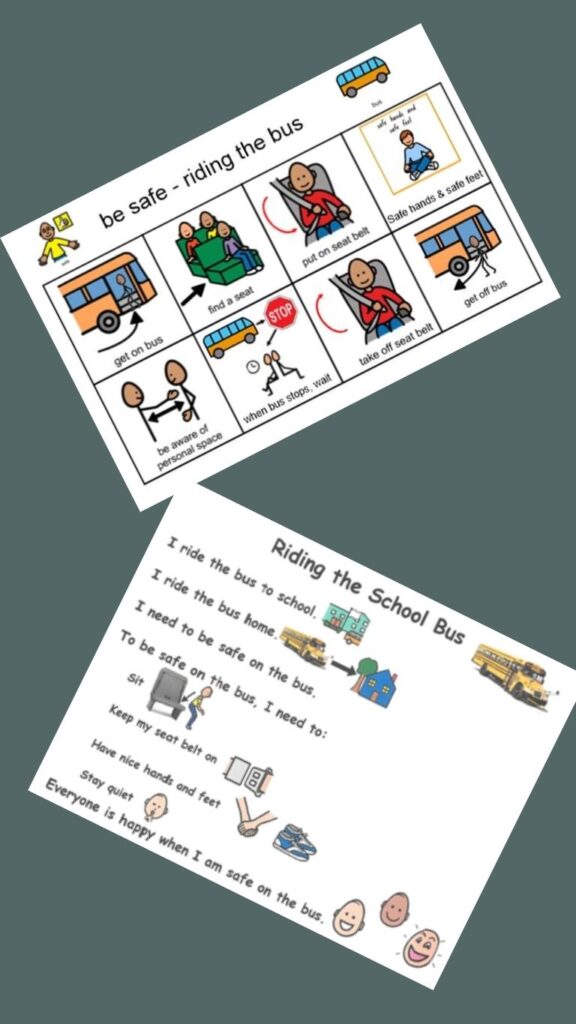
- Public Transport Social Story
Visual: photos showing steps to ride a bus: “Wait at bus stop → Board bus → Tap card → Sit down.”
Benefit: prepares the person for new environments and increases safe participation. - Restaurant Menu with Icons
Visual: menu showing photos/icons of dishes and choices like “spicy / not spicy.”
Benefit: helps ordering independently and reduces stress in noisy places. - Wayfinding Cards
Visual: simple map or icon route for a mall or campus visit, reinforcing navigation skills.
If “the visual didn’t work”, troubleshoot first
Before ditching visuals, try these quick checks:
- Was it modelled? Did adults show how to use it every time at first?
- Was the language matched? Are the words used in speech the same as the words on the visual? (Consistency is key.)
- Was it too complex? Simplify, fewer steps, clearer pictures.
- Was it visible and accessible? Place at eye level, in the activity area, or on a portable board.
- Was there reinforcement? Did the visual lead to something meaningful (choice, praise, break)?
- Was it practiced in multiple settings? Transfer by using the same visual logic at home, school and community.
If many items above are missing, visual failure is likely an implementation issue, and it is not a reason to stop using visuals.
How to introduce visuals (step-by-step)
- Select one clear target (e.g., morning routine, ordering food, asking for help).
- Design the visual with real photos or simple icons and 3–5 steps max. Use culturally familiar images (local foods, school uniforms, hawker scenes).
- Introduce & model: show the visual, say the words while pointing, and demonstrate the action.
- Example script: “Look at our schedule. After breakfast (point), we put on shoes (point).”
- Example script: “Look at our schedule. After breakfast (point), we put on shoes (point).”
- Prompt & practise: prompt the learner to check the visual before acting. Use physical prompting (pointing) initially.
- Reinforce: praise attempts and link the visual to meaningful outcomes (“Great — you looked at the chart and chose your snack!”).
- Generalise: use the same visuals or format across settings — inform teachers / caregivers.
- Fade prompts: slowly reduce adult pointing/verbals as the learner begins to use the visual independently.
- Review & revise: if it’s not used, simplify or change placement, and revisit modelling.
Scripts examples when using visuals
Short, consistent phrases help. Use the visual while you say the line.
- Introducing a schedule: “Let’s see the chart. After breakfast, we go to school. What comes next? Point to it.”
- Choice board: “Apple or banana? Point to your choice.”
- First–Then board: “First brush teeth (point), then play (point). Ready? First!”
- AAC prompting: “I’ll show you on your device. Tell me ‘more’.” (Model on the device immediately.)
- Transition cue: “Two more minutes — look at the timer” (point to visual timer).
Consistency in wording matters more than fancy visuals. Use the same short phrase every time.
Why visuals are for everyone (inclusion, not segregation)
Visuals are universal aids: many adults use calendars, sticky notes and maps. Offering visuals is not segregating someone; it’s leveling the playing field. When schools and communities adopt visual signage and predictable routines, they reduce barriers — making spaces more accessible for people with sensory differences, limited working memory, or multilingual backgrounds.
Measuring success: what to expect and when
Visual supports don’t create overnight miracles. Expect small, measurable steps:
- Stage 1: learner notices the visual and may point when prompted.
- Stage 2: learner begins to follow steps with reduced prompting.
- Stage 3: learner uses the visual independently in routine tasks and across settings (if generalisation is practised).
Track progress with simple data: number of independent steps completed, number of verbal attempts, or frequency of prompting needed. Celebrate progress, even partial independence is meaningful.
Practical resources & next steps
- Use photos of local places and foods (hawker stalls, MRT, school uniform) to make visuals culturally relevant.
- Create bilingual visuals if helpful (e.g., English + Mandarin/Tamil/Malay). Use the same word order across languages for consistency.
- Share visuals with school staff and family so everyone references the same tool. A short video showing the learner using the visual helps teachers follow the same routine.
- Portable options: laminated cards, a small visual wallet, or an app on a phone/tablet for community outings.
Key takeaways
- Visual supports are teaching tools that increase clarity, independence and confidence. It is not a long-term crutch.
- The difference between success and failure is almost always how a visual is used: model it, reference it, practise it and fade prompts.
- Visuals work across home, school and community, and benefit learners of all kinds.
- For autistic learners and many neurodivergent individuals, consistent referencing and predictable use are especially important.
- Start small, be consistent, and team up with teachers and therapists for carryover.
Ready to try visuals that work?
A coaching session to set up visuals for your child or classroom, book a consult session with Joyful Soul Psychology. We’ll support you in designing visuals that are relevant, easy to use, and built for independence.